How to Send Email Invitations Out Yourself
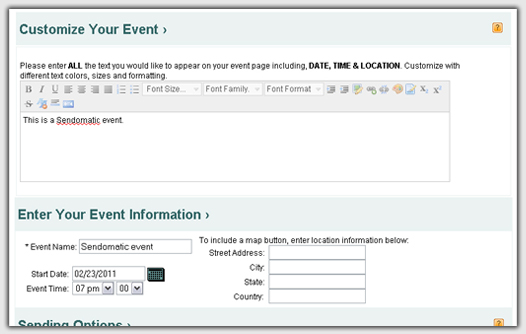
1. Select a design and choose CREATE INVITATION, you will be taken to the "Enter Event Information" page.
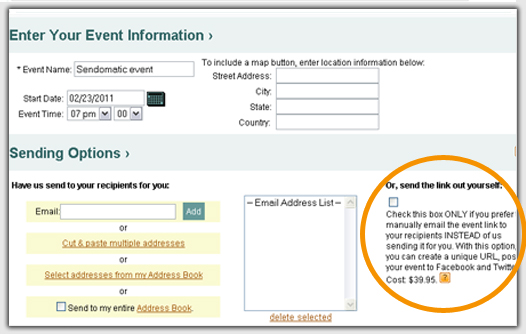
2. Fill in the appropriate fields as shown in our example here. Do not put in any recipients' email addresses.
3. Check the box that says OR, SEND THE LINK OUT YOURSELF.
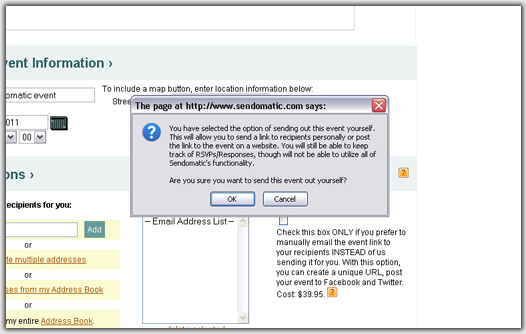
4. You will get a pop-up asking you to verify that you want to send the event yourself. If you agree that you want to do this, click OK. NOTE: You cannot change a Send It Yourself event back to one that we send for you. Please be certain you want to send it yourself before choosing this option.
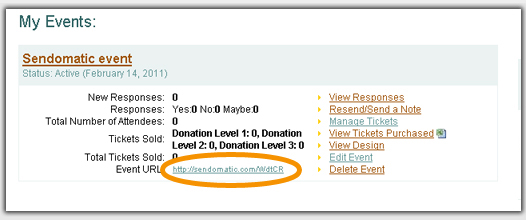
5. Click the SEND. Upon receiving payment, you will get your event's URL (web address) via email. You can also get your URL on the MY ACCOUNT page.
6. If you would like, you can change the URL we set for you and make your own Custom URL.
7. Once you receive your URL, you can then send it out via your own email system, post on social media or print on offline marketing materials.
8. You can add features like RSVP by clicking EDIT EVENT and then the MORE FEATURES link at the top of the screen.

9. From the MORE FEATURES page, check the box for RSVP OPTION if you want your guests to be able to RSVP. You can also hide others' responses from your guests. Be sure to hit SAVE when you are done selecting your optional features.

10. You can add a poll to your event, which your guests will be required to answer when they RSVP. Here are details on adding a poll to your event. If you'd like to sell tickets (or offer them free), you can also do that with a SEND IT YOURSELF event. Here are details for selling tickets.